Chibi body proportions are different from the usual anime or manga drawings. Chibis are small, cute, and adorable characters and their small body and big head make them even more fun-looking!
In this art tutorial blog, I’m going to help you learn about how to draw chibi body proportions in 3 views: front view, 3/4 view, and side view. Let’s get to it!
Table of Contents
Body Proportion Guide
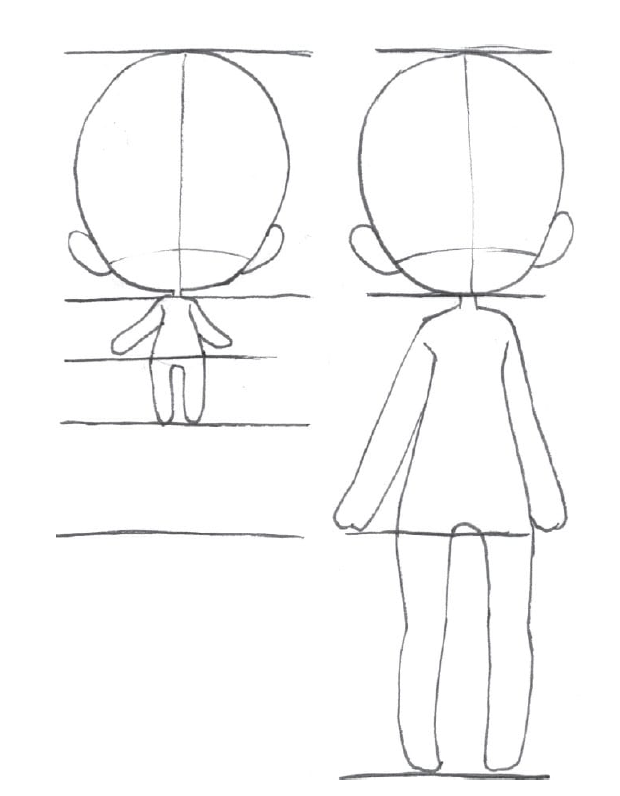
You already know that a chibi has a bigger head than its body. The rule of thumb is the head is the same size as the rest of the body. Here’s a simple illustration of the difference between a regular-sized character and a chibi drawing:
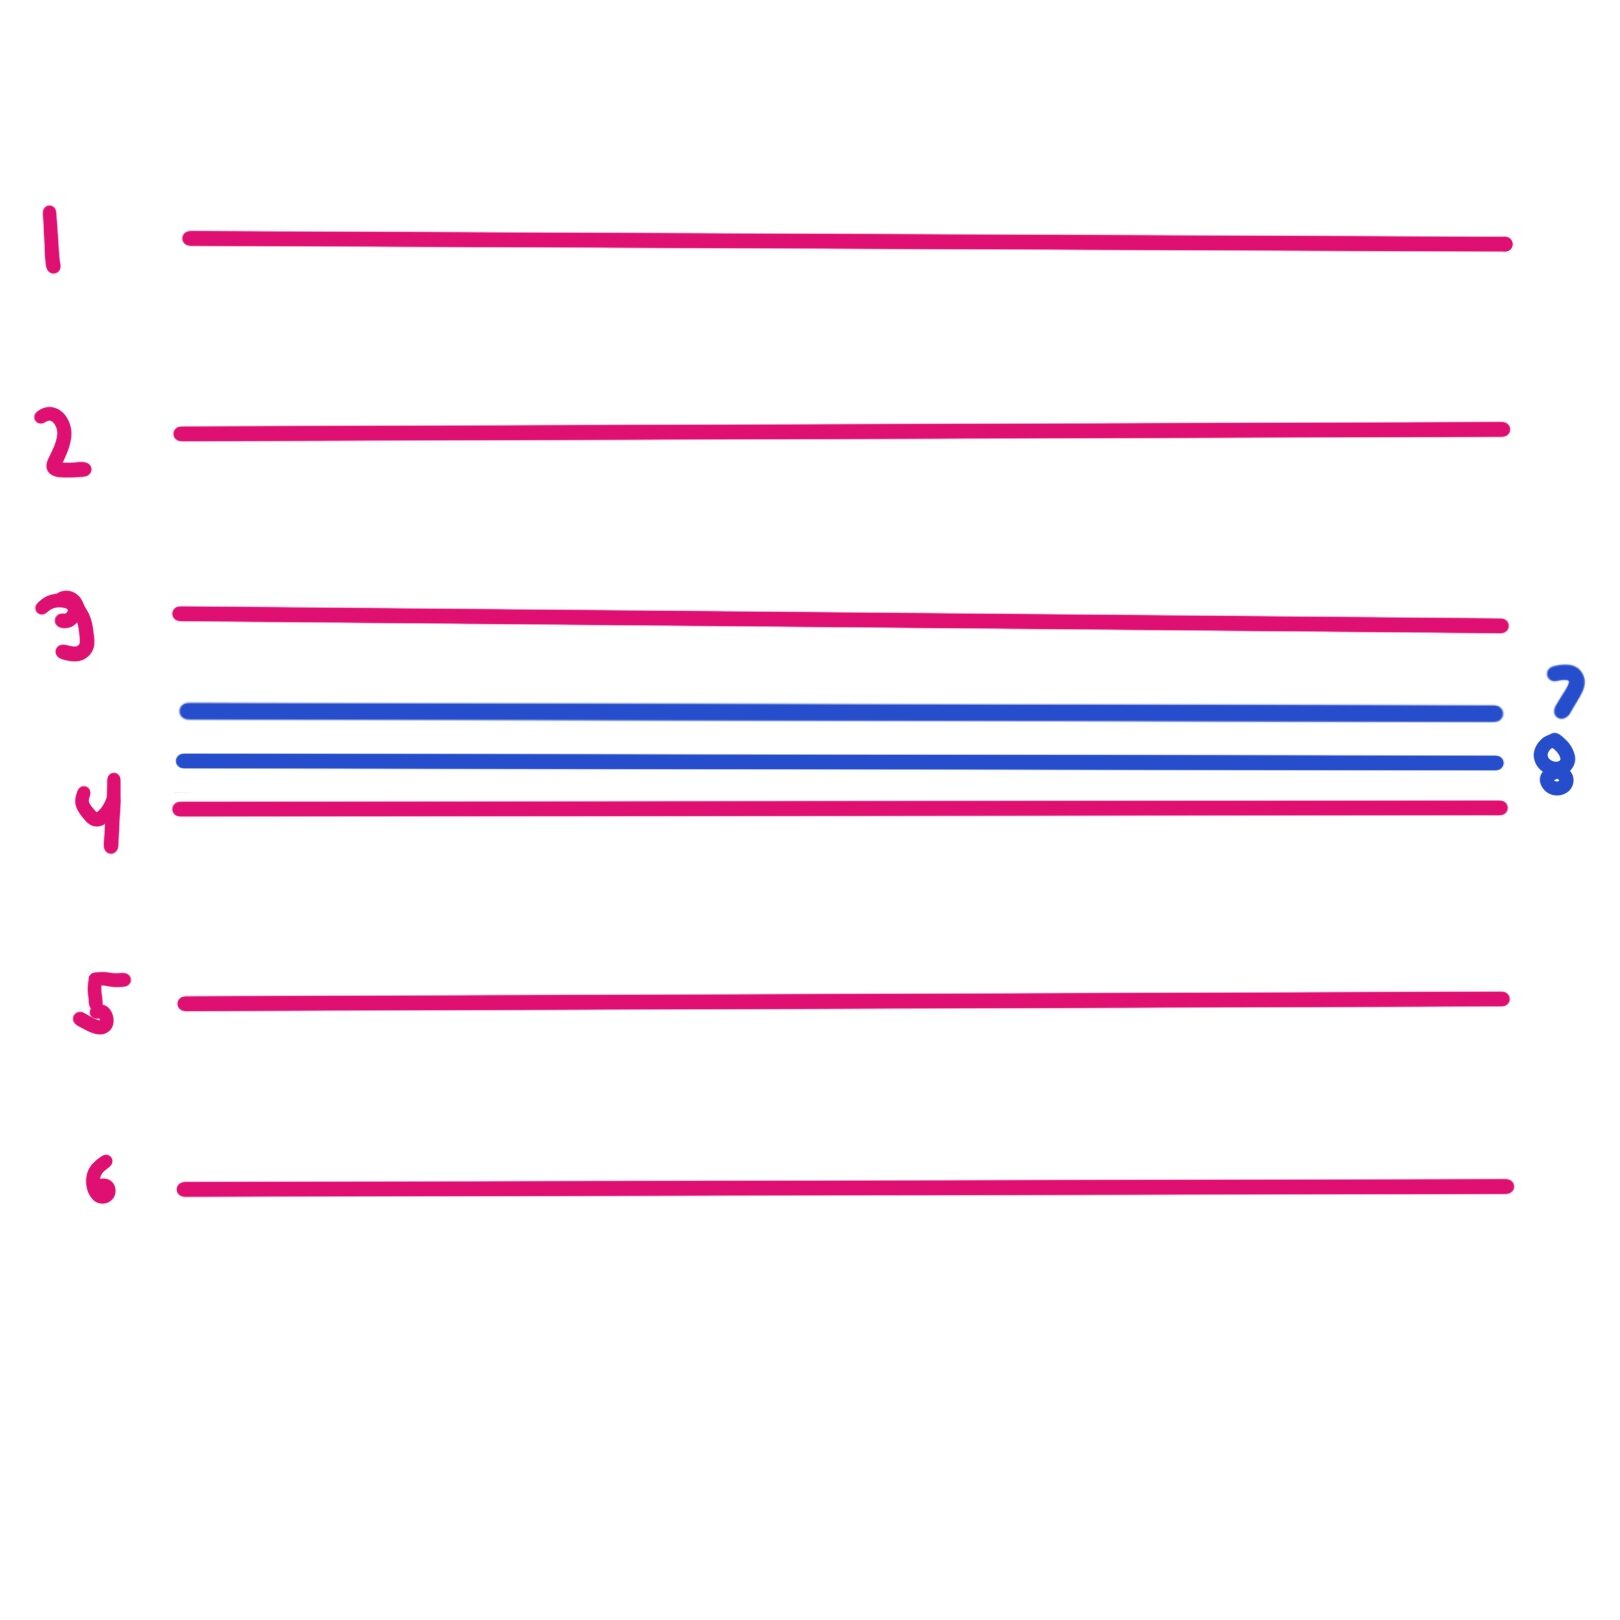
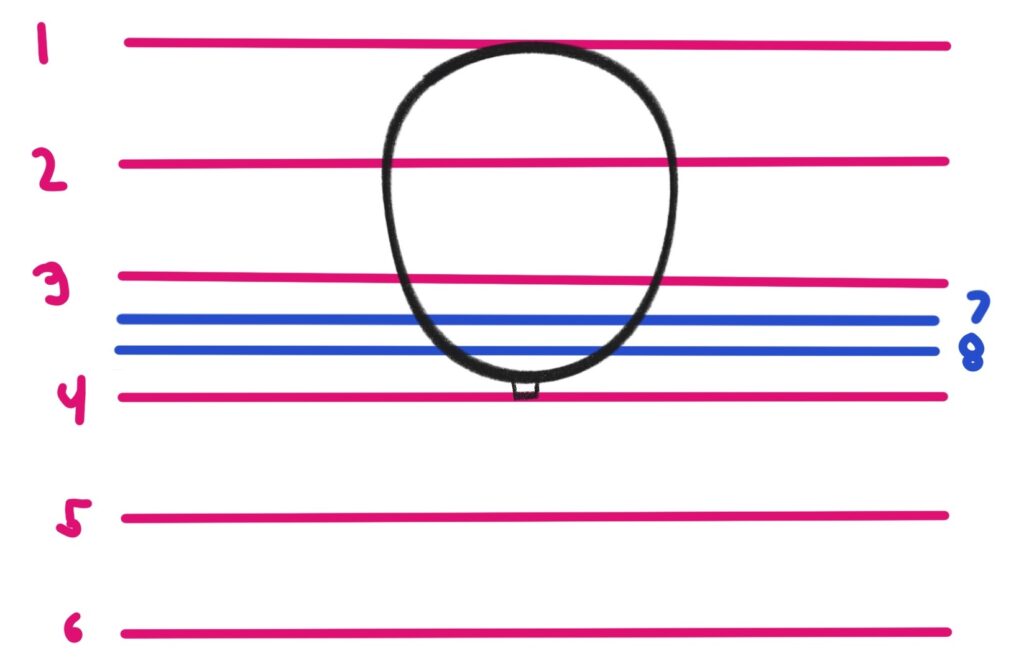
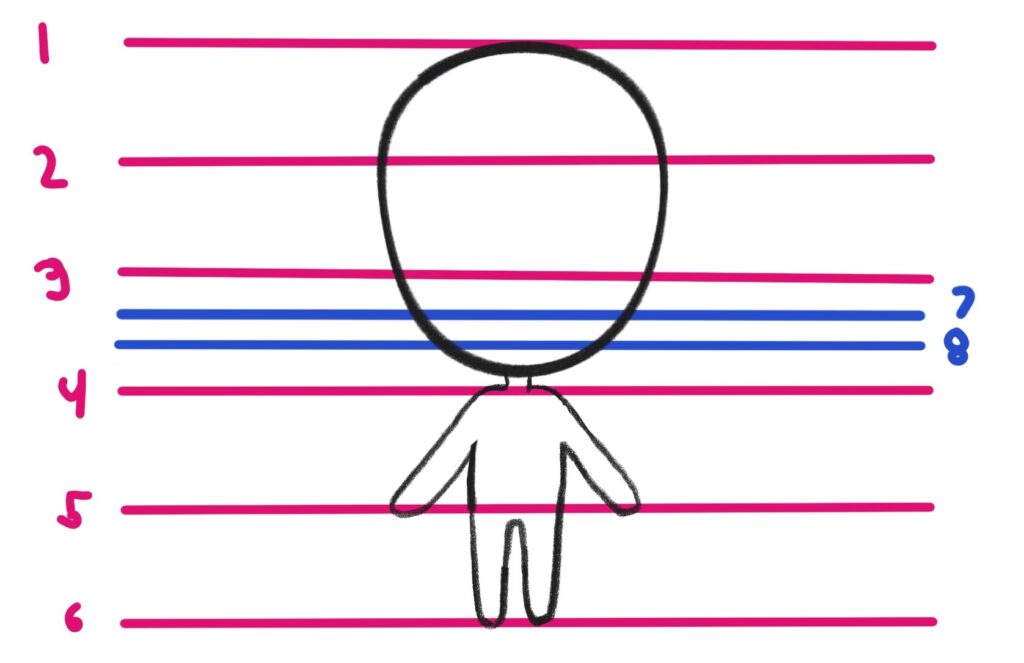
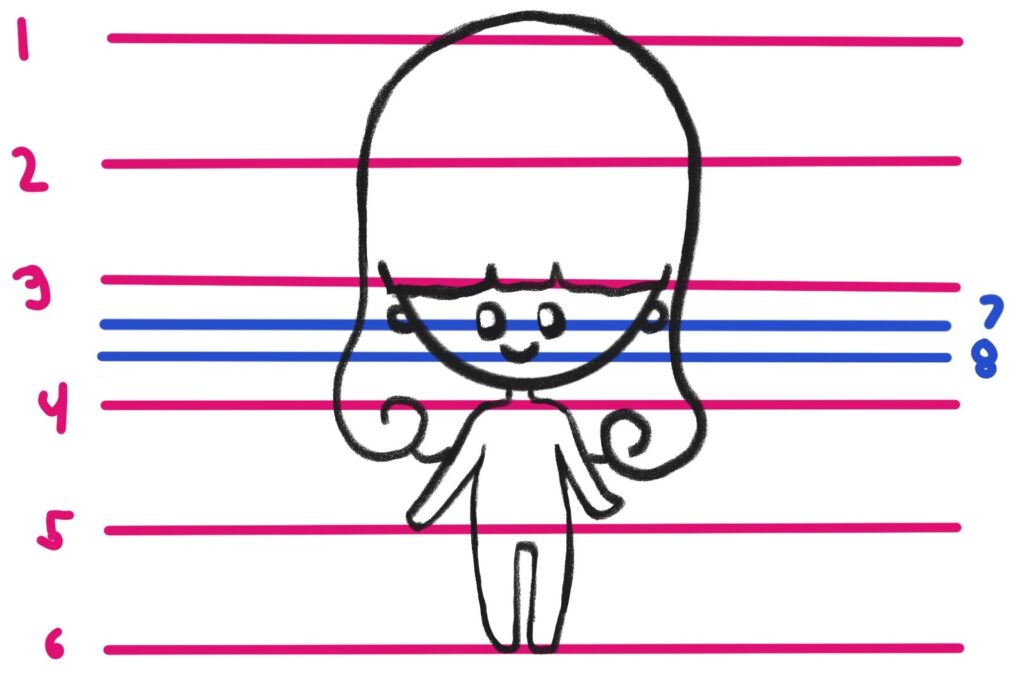
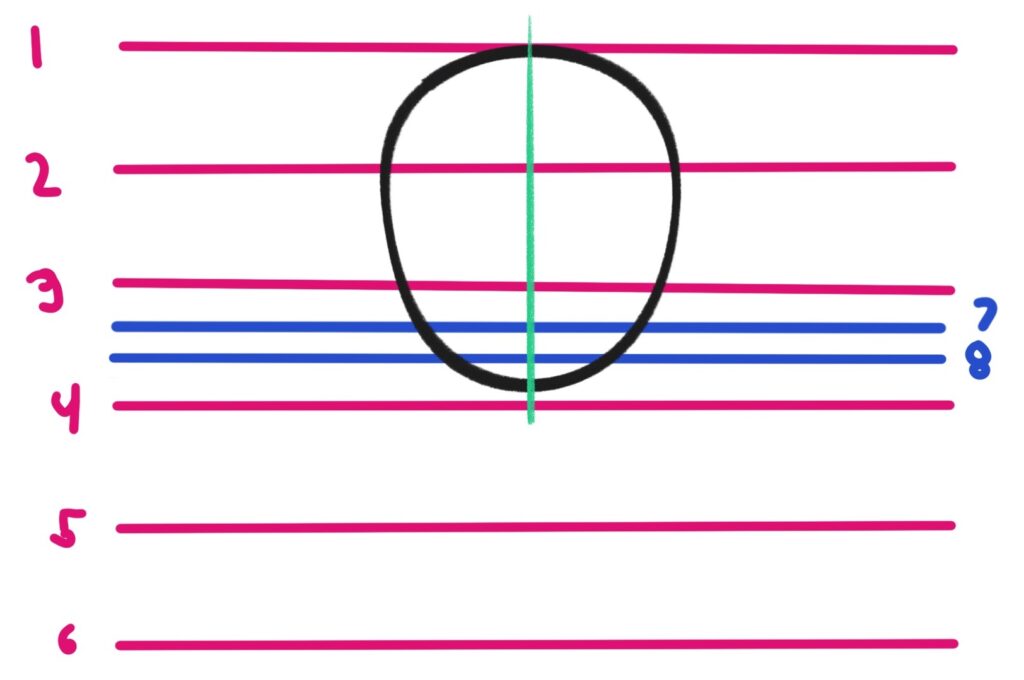
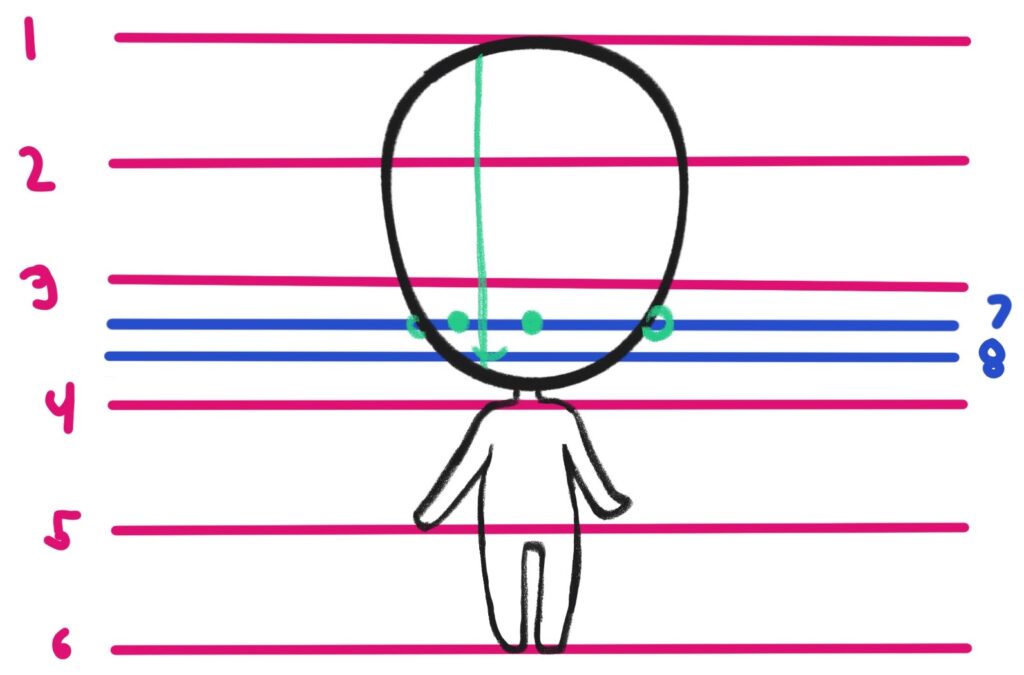
Now, here’s a guide you can use to draw your chibi character. Make 6 lines equal in spaces. Between lines 3 and 4, draw two more lines. Line 7 will be the line for the ears and eyes while line 8 is for the mouth.
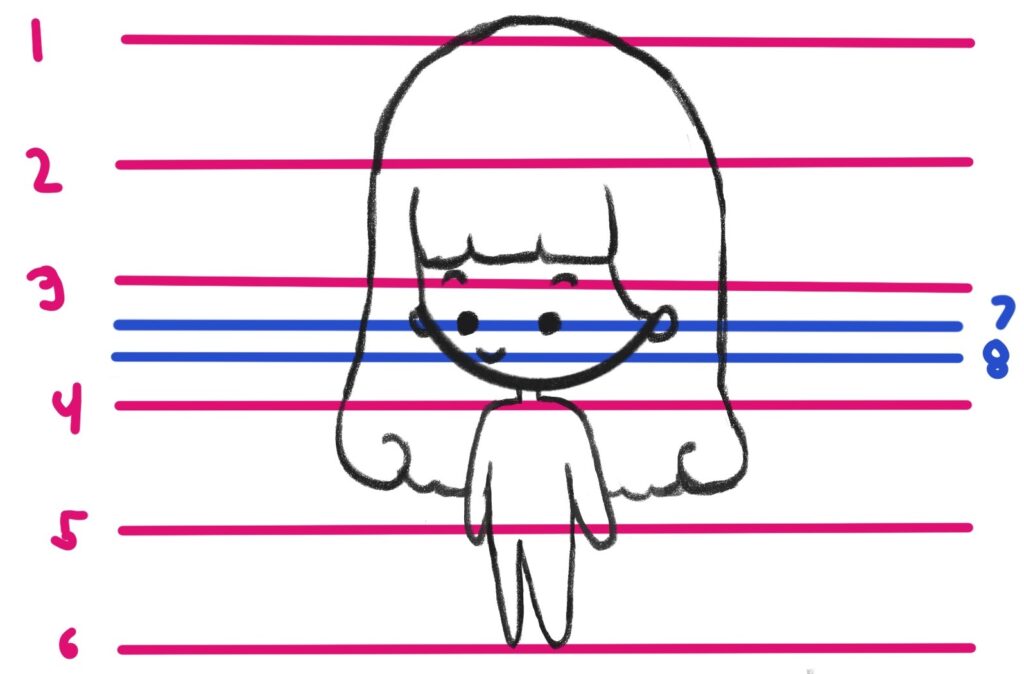
Draw Chibi Body Proportion 1: FRONT-VIEW
From lines 1 – 4, you will draw your chibi’s head, leaving a very small space for the cute neck. Necks can be optional too. Some chibis don’t have them. If you prefer a chibi without neck then you can make the head shape bigger and reach the line 4.

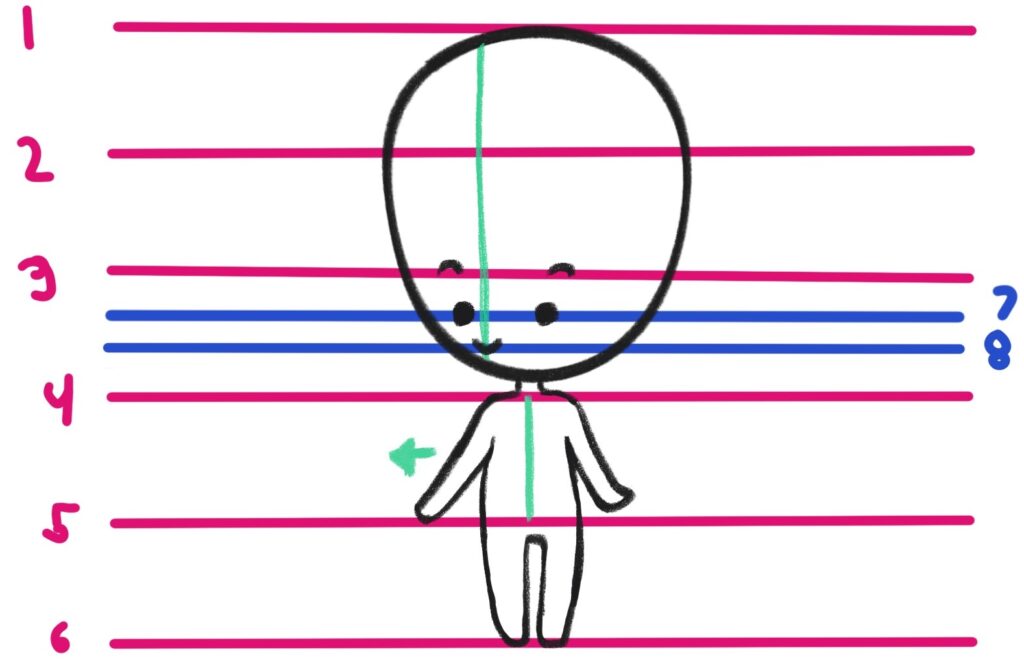
Draw the neck, a small rectangular shape below the head.
Next, draw the upper torso on lines 5 – 6.

Next, draw the arms on the side of the body. Erase the lines inside the body.
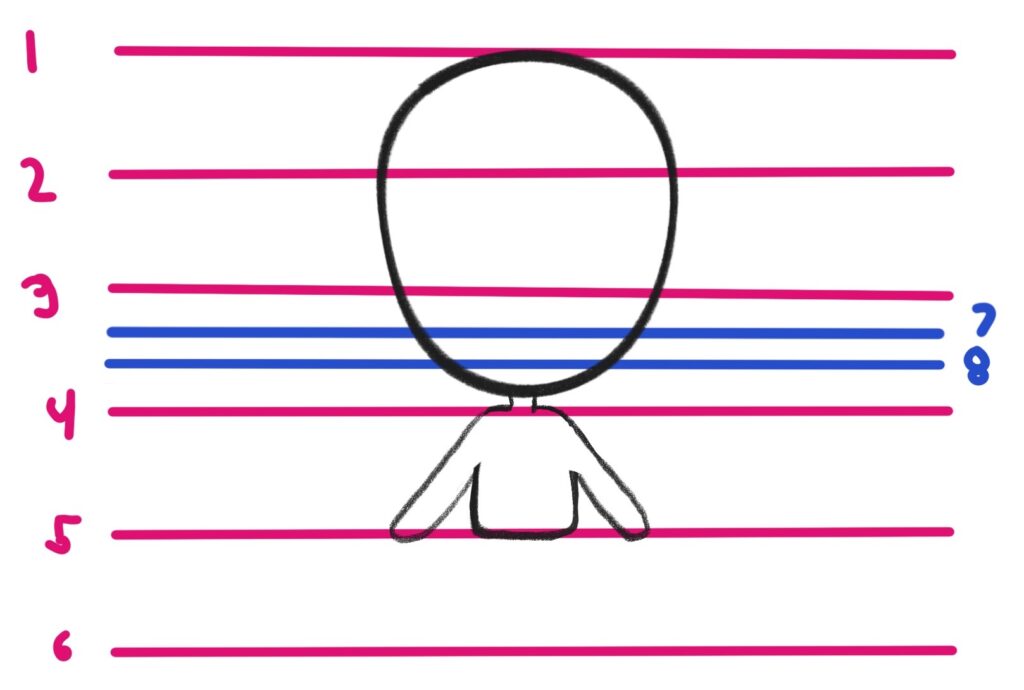
Draw the legs and feet from lines 5 – 6 and erase the extra lines within the torso.
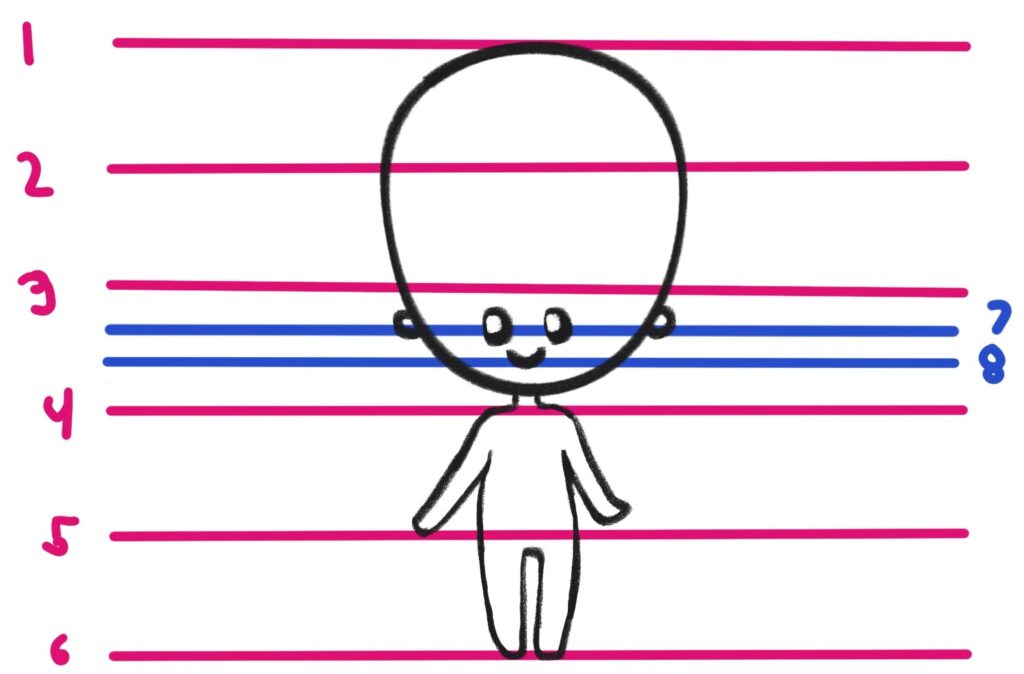
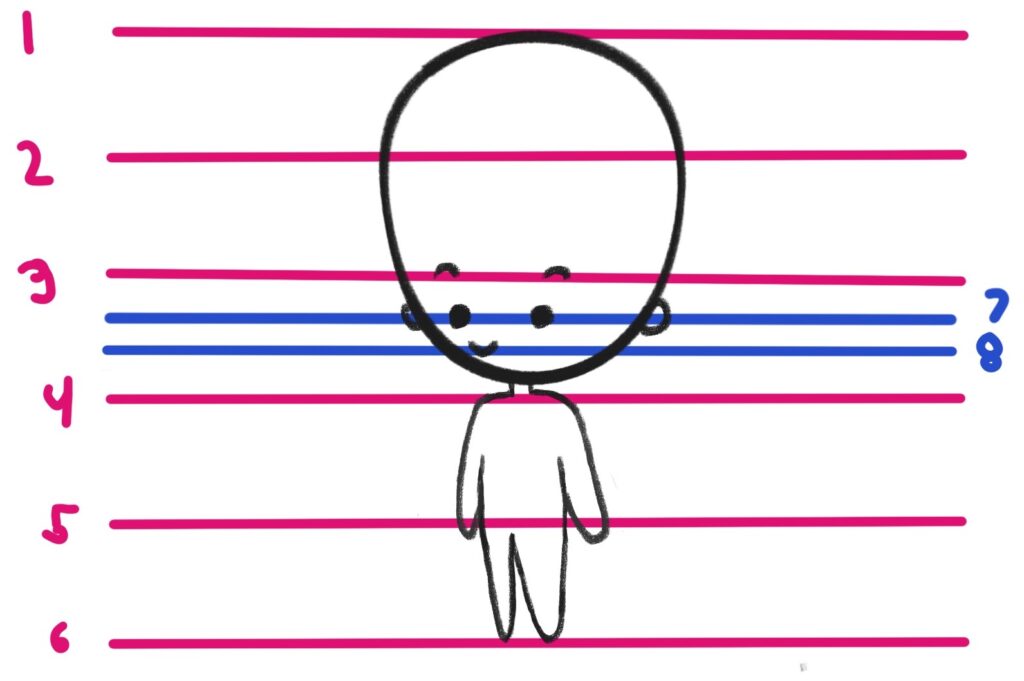
Draw the facial features and the ears. Here’s a blog on how to draw anime eyes better if you want to draw eyes that are not just simple dots 🙂
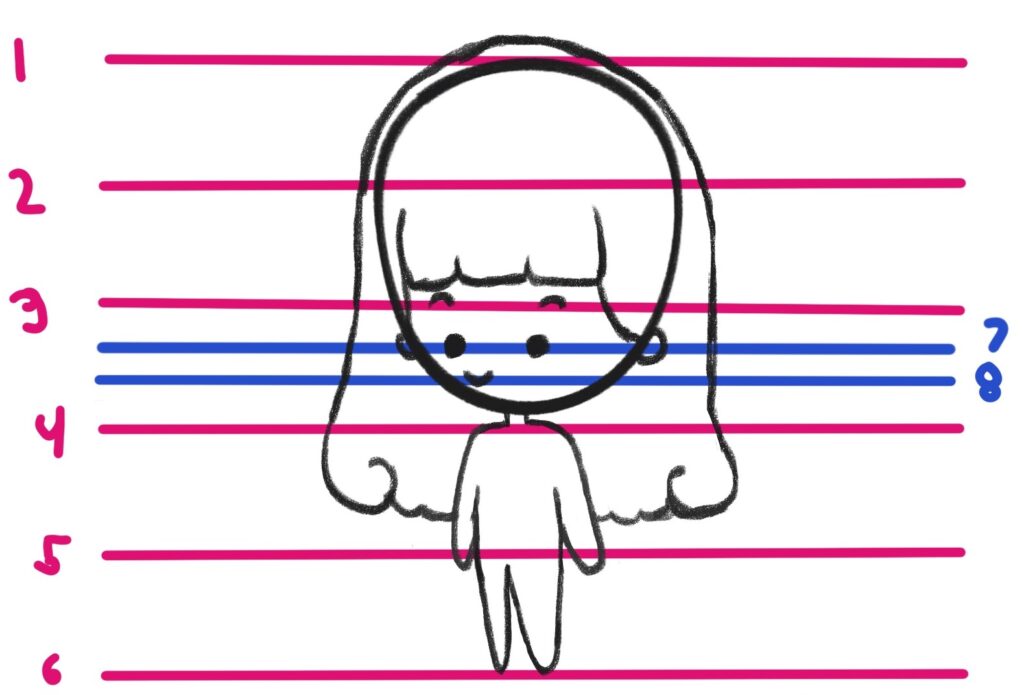
Draw the hair. When drawing hair, draw above the shape of the head, not on the head’s line itself.
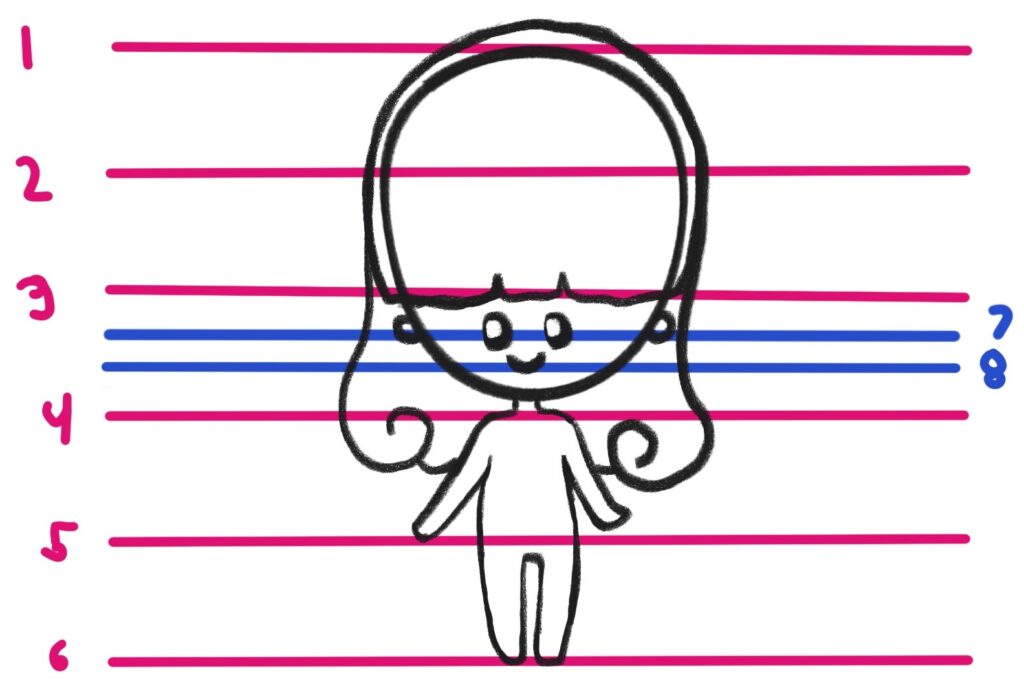
Lastly, erase the inner lines. Clean your sketch as needed.
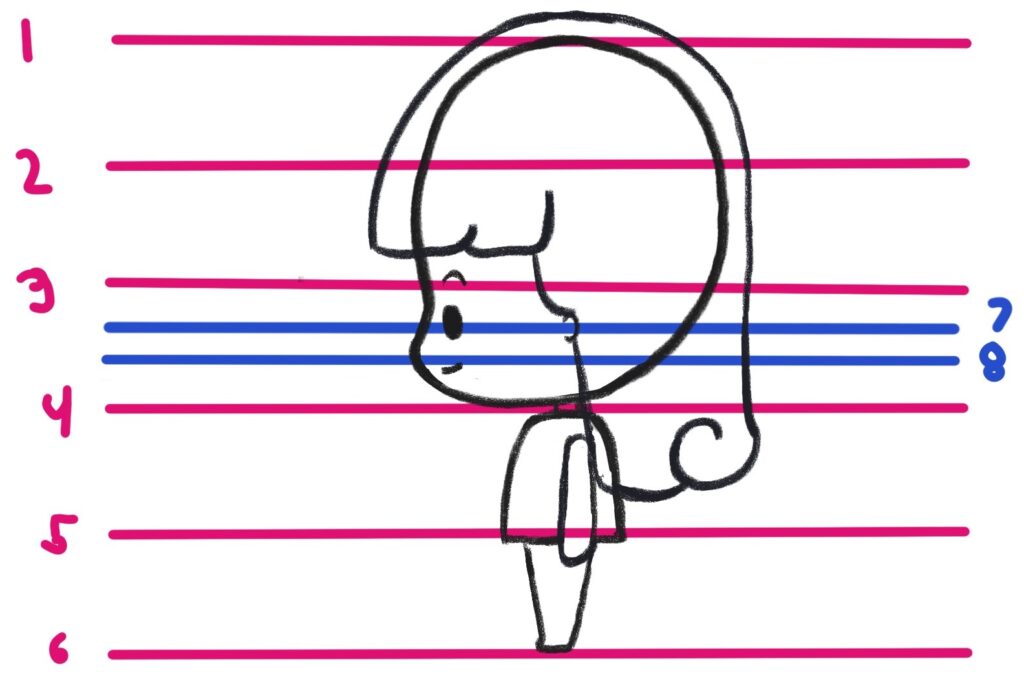
Draw Chibi Body Proportion 2: 3/4 View
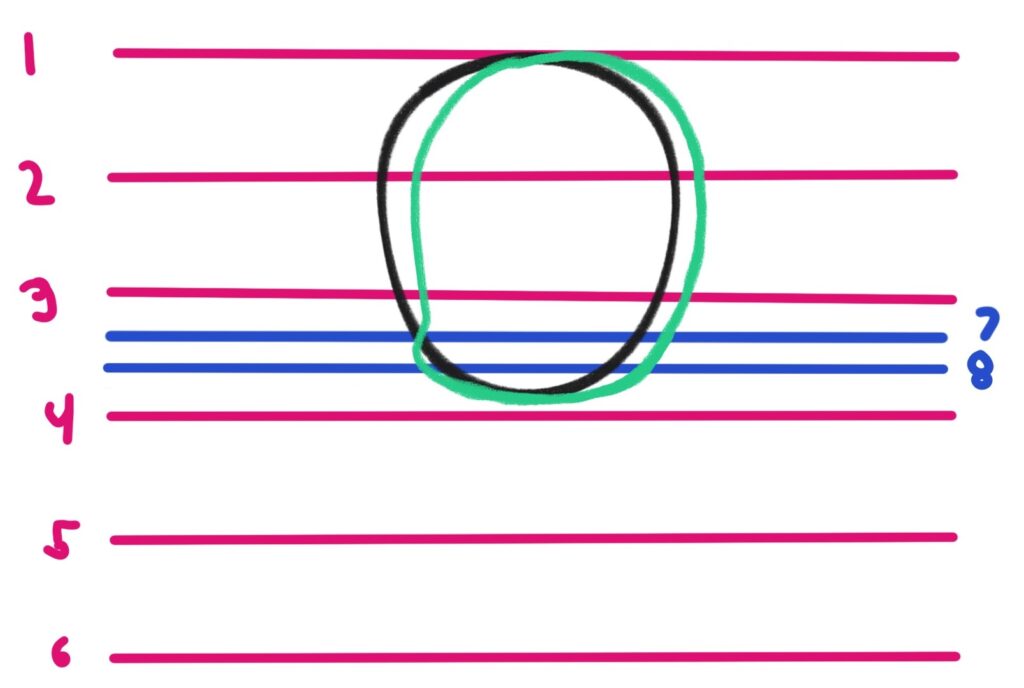
The 3/4 view means that the chibi is facing a little sideways. Start with the oval shape for the head.

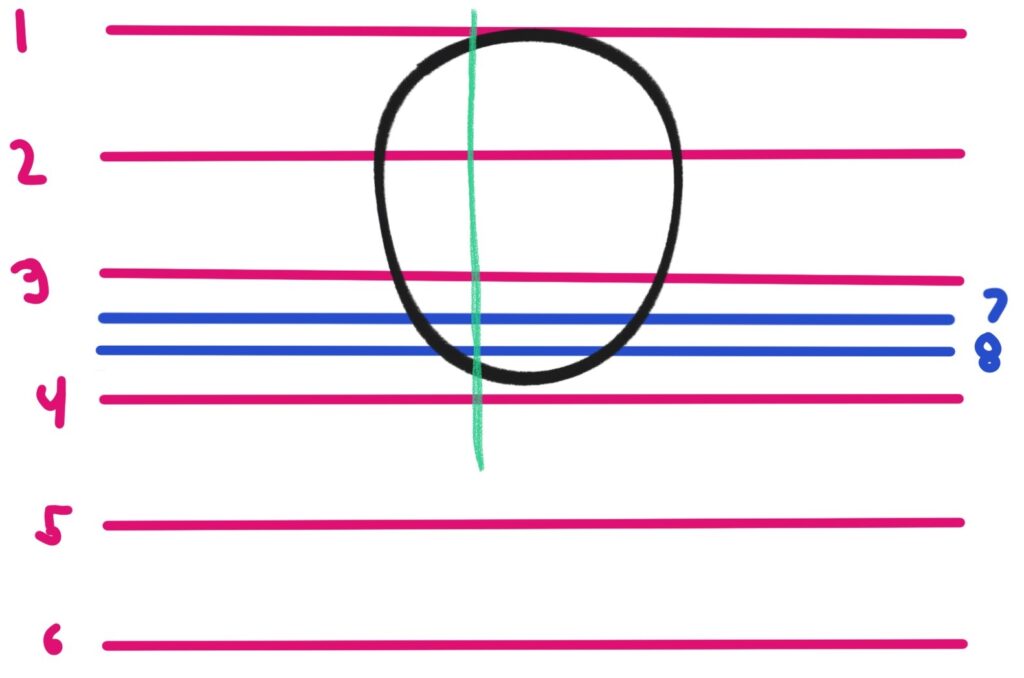
When we’re drawing the front view chibi, the facial guideline is at the center of the face. With a 3/4 view, the guideline will have to move a little bit to the side. The example I drew below is facing the left side a little.
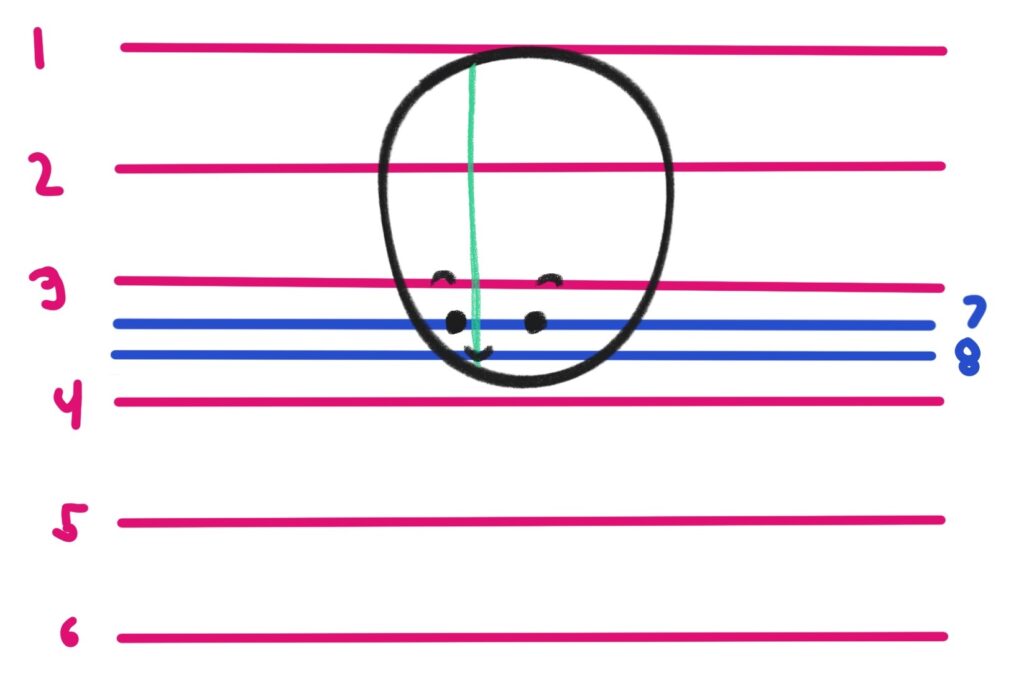
Draw the face and the ears. The right side of the ear is a little bigger than the left side. On the sample image, I added the rest of the body part, you’ll notice that it is similar to the body of the one in the front-view chibi. We’ll make a few adjustments by trying to make the body face the left side a little.
Imagine the green line at the middle of your chibi. This should move to the left side a few notch.
Start drawing the neck. Then draw the torso but keep in mind that the body should be inclined to the left side a bit. For example, the right leg should be wider than the left side.
Next, draw the hair. Similar to the front view, the hair should be above the line of the head.
Lastly, erase the extra lines.
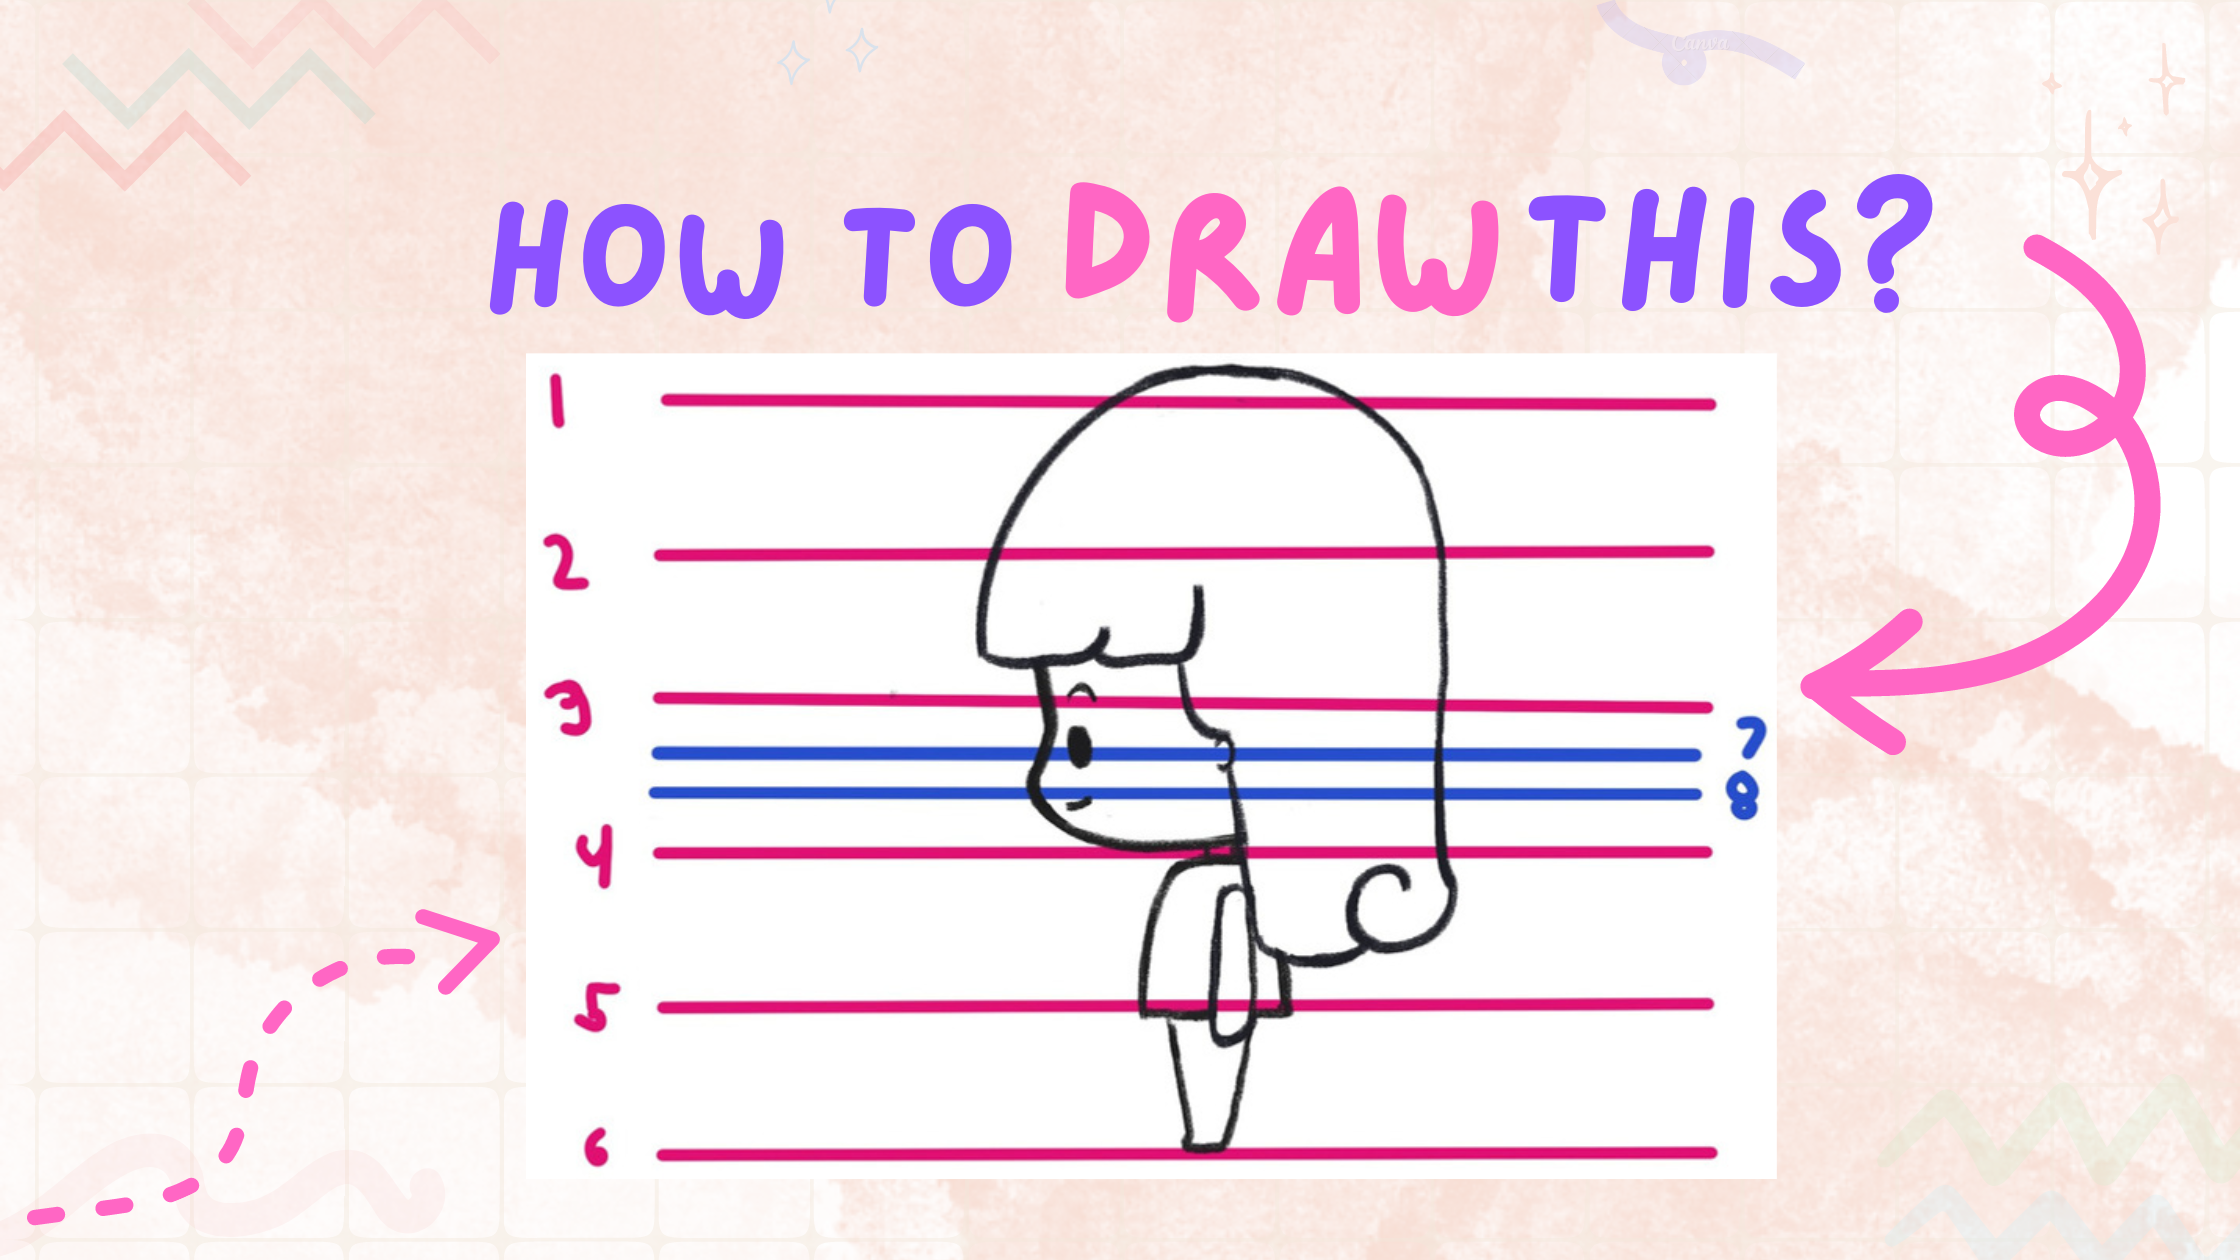
Draw Chibi Body Proportion 3: Side View
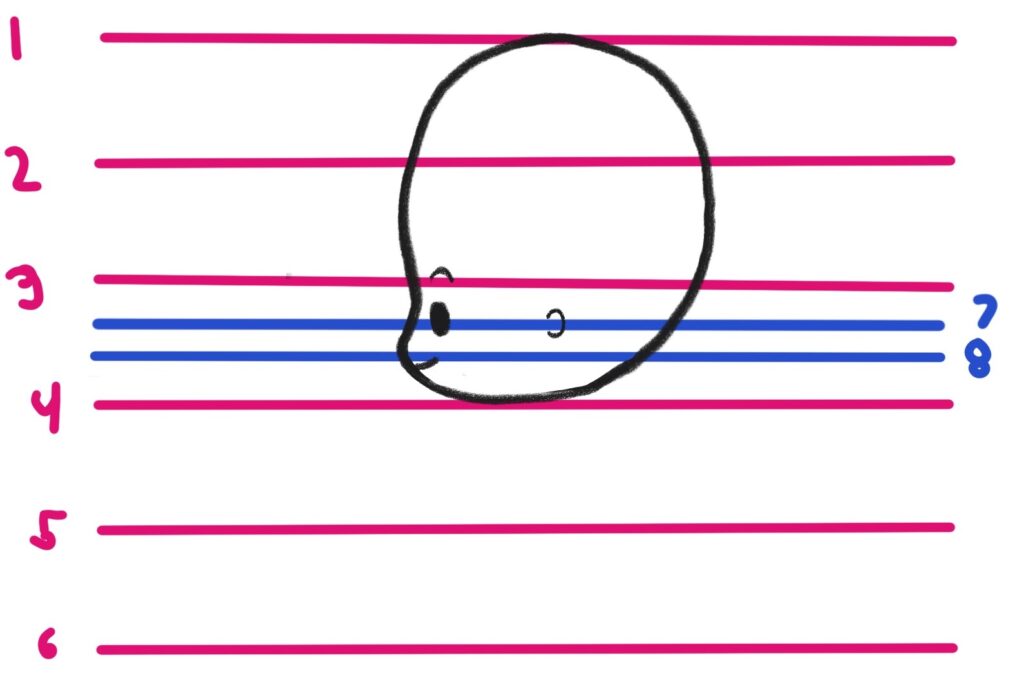
Draw a circle for the chibi’s head. Then, re-shape the circle by drawing a line on the left part partially cutting off some space of the circle. Upon reaching lines 7 and 8, make a little bulging curve to represent the cheeks. Close off the shape.
Next, draw the eye, mouth and ear. Only one eye and ear will be visible. For the mouth, make a short curvy line. You can connect the mouth line to the cheek’s line or not.
Next, draw the body. The chibi’s body will be sideways too so it should appear thinner than the front or side view.
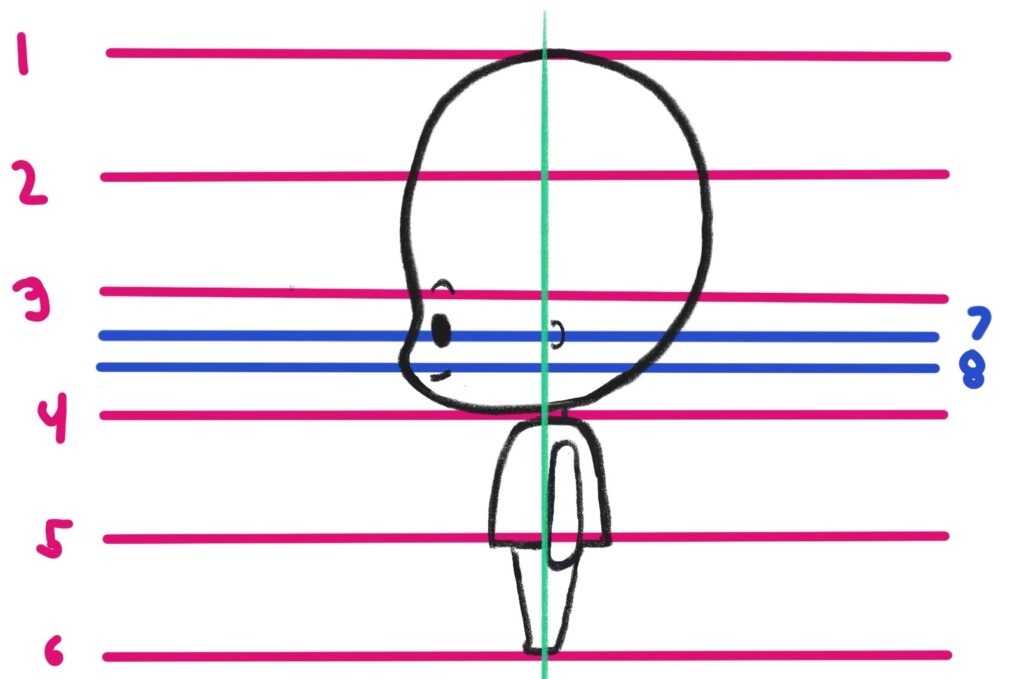
Draw the hair.
Erase the extra head line and back line.
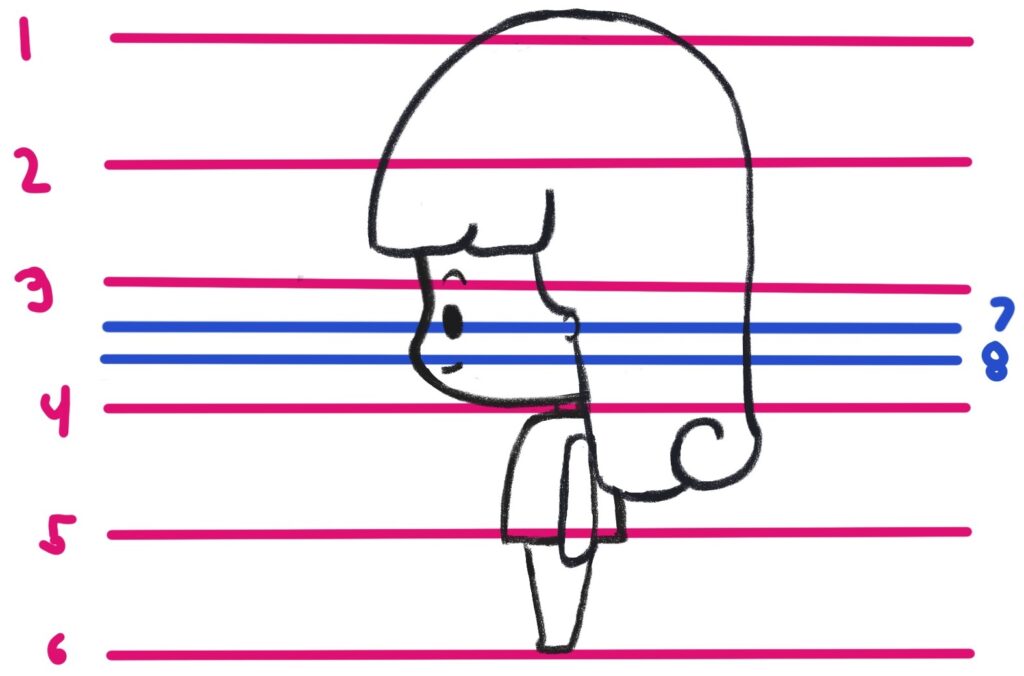
And now we’re done!
I hope you learned a lot on how to draw chibi body proportions! Remember to download the PDF file so you can keep practicing. If you think that your chibi is not cute enough, don’t give up! Just keep trying! I know my work isn’t the perfect chibi proportions at times but I am learning how to draw chibi and it’s fun to share these learnings to others!
Keep drawing and keep learning!
Tag me on Insta if you want to share your work! @cutedrawingsdaily_

Want to learn more? How about getting a free 30-day Skillshare class trial! Yes, no cost at all! Sign up now!